In the epic battle against the insidious villain known as mold, the unsung hero is none other than our trusty mold remover! Picture this: your bathroom, once a serene oasis, now resembling a swampy jungle thanks to unwanted guests like mildew. Fear not! With a trusty mold remover by your side, you can transform that moldy mess into a sparkling sanctuary.
Mold removers come in all shapes and sizes—from natural potions brewed in your kitchen to chemical concoctions that make your cleaning dreams come true. Whether you’re a DIY warrior or a home improvement novice, understanding how to choose the right mold remover for your specific surfaces is crucial. So, buckle up, grab your cleaning gear, and let’s dive into the world of mold removal like it’s a tropical vacation—minus the moldy beach towels!
Mold Remover Products

Mold is the uninvited guest that just won’t leave your home, lurking in damp corners and dark spaces. Thankfully, there’s a whole arsenal of mold remover products ready to battle this stubborn foe! From natural solutions to chemical warriors, the marketplace is brimming with options that promise to evict mold with the efficiency of a bouncer at a nightclub. Let’s dive into the realm of mold removers and explore what’s hot (and not) in the fight against fungi.
Effective Mold Remover Products
Various mold remover products are available that cater to different needs and preferences. These options can be classified into natural and chemical categories, each offering unique benefits. Understanding these products helps in choosing the best fit for your particular mold dilemma. Here’s a roundup of some of the most effective mold remover products:
- Concrobium Mold Control: A non-toxic solution that eliminates mold using a patented technology to encapsulate and remove spores. No bleach, no fuss—just mold removal that won’t leave you gasping for air!
- RMR-86 Instant Mold Stain Remover: This chemical marvel works like magic, eliminating stains in seconds. Just spray, wait a minute, and watch those pesky spots vanish as if they were never there!
- EcoSMART Organic Mold Killer: For the eco-warriors among us, this product offers a natural formula that’s tough on mold but gentle on the environment. Smells pleasant too—no more toxic cloud while you clean!
- Clorox Mold & Mildew Remover: A classic in the mold-busting world, this bleach-based option is effective but requires careful handling. It’s like bringing a bazooka to a knife fight—effective, but handle with care!
Natural vs. Chemical Mold Removers
The age-old debate of natural vs. chemical mold removers can be as heated as a sauna! While both types have their merits, knowing the pros and cons of each can guide your choice. Natural mold removers, like vinegar and baking soda, offer a gentle yet effective way to combat mold without harsh chemicals. They’re eco-friendly and safe for most surfaces, but may require a bit more elbow grease and time.
On the other hand, chemical mold removers deliver rapid results, cutting through mold and mildew like a hot knife through butter. However, they often come with strong odors and safety precautions.In summary:
- Natural Products: Safe, eco-friendly, and usually non-toxic, but may need repeated applications.
- Chemical Products: Fast-acting and powerful, but can be hazardous if not used properly.
Choosing the Right Mold Remover
Selecting the appropriate mold remover depends on the surfaces and materials you’re dealing with. For instance, using bleach on porous materials can be like trying to use a sledgehammer to crack a nut—overkill! Here’s a breakdown of how to match your mold remover to different surfaces:
- Wood Surfaces: Opt for a natural or specialized mold remover to prevent damage. Using harsh chemicals could warp or discolor the wood.
- Tiled Surfaces: Most chemical mold removers work well here. For grout, consider a product specifically designed for tile and grout cleaning.
- Fabric and Upholstery: Steer clear of bleach! Look for gentle, natural solutions that can penetrate fibers without causing harm.
- Bathrooms and Kitchens: These high-moisture areas can benefit from either type. Chemical products can quickly eliminate mold in these places, but ensure good ventilation to avoid inhaling harsh fumes.
“A clean space is a happy place—especially when it’s mold-free!”
Home Improvement and Mold Prevention
Mold might think it’s the uninvited guest at every home party, but with the right home improvement strategies, you can send it packing! Mold thrives in damp nooks and crannies, especially in areas like bathrooms and basements, where humidity is often higher than a cat on a hot tin roof. Let’s dive into some savvy ways to keep your home mold-free and moisture levels in check, so you can enjoy a fresher, healthier living space.
Methods to Prevent Mold Growth
Preventing mold growth starts with understanding where it loves to hang out. Here are some effective methods to thwart its ambitions in critical areas of your home:
- Ventilate Your Bathroom: Ensure your bathroom is as well-ventilated as a bakery on a busy Sunday morning. Install exhaust fans to whisk away steam and humidity, and open windows whenever possible to let in fresh air.
- Banish the Basement Blues: Basements can be mold’s playground; keep them dry by sealing cracks in walls and floors. A dehumidifier can act like a bouncer, keeping the moisture out and the air dry.
- Gutter Maintenance: Clean your gutters regularly, like you would dust off your grandma’s favorite knick-knack. Blocked gutters can lead to water pooling around your foundation, giving mold a VIP pass to your home.
- Use Mold-Resistant Products: When renovating, opt for mold-resistant drywall and paint, letting mold know it’s not welcome in your newly spruced-up spaces.
- Monitor Humidity Levels: Keep indoor humidity between 30% and 50%, a sweet spot that keeps mold feeling left out. Use hygrometers to keep an eye on moisture levels, as they’re like the home’s health monitors.
Essential Home Improvements to Minimize Moisture
Investing in key home improvements can significantly reduce moisture and humidity levels in your home. Here’s a handy guide to bolster your defenses against unwanted mold growth:
- Install Proper Insulation: Insulate walls and ceilings with materials designed to fight moisture, keeping warm air in and cold air out – it’s like wrapping your home in a cozy blanket!
- Upgrade Drainage Systems: Ensure your yard slopes away from your home, directing rainwater to where it can party freely in the ground, far from your foundation.
- Upgrade to Energy-Efficient Windows: Double-pane windows not only save on energy bills but also reduce condensation buildup inside your home, creating an inhospitable environment for mold.
- Seal Windows and Doors: Caulk around windows and doors like icing on a cake to prevent rain and humidity from sneaking inside. It’s a simple fix that can save you a moldy mess later!
- Regular Maintenance Checks: Schedule routine maintenance checks of your home’s plumbing and roofing to catch leaks before they become mold’s new favorite hangout.
Mold Risk Assessment Checklist for Homeowners
Assessing mold risks in your property is crucial for a mold-free living environment. Below is a checklist to help homeowners identify potential mold problems:
- Check for Visible Mold: Look for dark spots in damp areas like bathrooms, kitchens, and basements.
- Inspect for Water Damage: Examine walls, ceilings, and floors for signs of water stains or bubbling paint.
- Monitor Humidity Levels: Regularly check humidity levels with a hygrometer; anything above 50% is a red flag.
- Assess Ventilation: Ensure all rooms are properly ventilated, especially those where moisture accumulates.
- Look for Condensation: Check windows, pipes, and walls for condensation, which can indicate too much moisture.
“An ounce of prevention is worth a pound of cure, especially when it comes to keeping mold at bay!”
Cleaning Tips and Tools for Mold Removal
Mold may feel like that uninvited guest who’s overstaying their welcome, but don’t worry—it’s time to show them the door! With the right tools and a pinch of humor, you can boot mold from your space faster than you can say “I should’ve bought that dehumidifier sooner!” Let’s dive into the essential cleaning tips and tools that will have your home mold-free and looking spick-and-span.
Essential Cleaning Tools and Equipment
When it comes to tackling mold, you need the right arsenal. Think of it as gathering your superhero squad—the more equipped you are, the better your chances of victory! Here’s a list of must-have tools that will help you banish mold like a boss:
- Protective Gear: Before you start your mold-fighting mission, don your superhero attire! This includes gloves, goggles, and a mask. Trust us, you don’t want to be inhaling those sneaky spores!
- Scrub Brushes: Get ready to scrub-a-dub! A stiff-bristle brush is perfect for textured surfaces, while a sponge works wonders on smoother areas. Think of it as a mini workout—your arms will thank you later.
- Spray Bottles: Fill these babies with your chosen mold remover solution. A good spray bottle allows you to evenly distribute your cleaning concoction without turning it into a science experiment gone wrong.
- Bucket: For rinsing and soaking sponges or brushes, a trusty bucket is essential. Plus, it can double as a makeshift stool if you need to reach those hard-to-get spots (just don’t get too comfortable!).
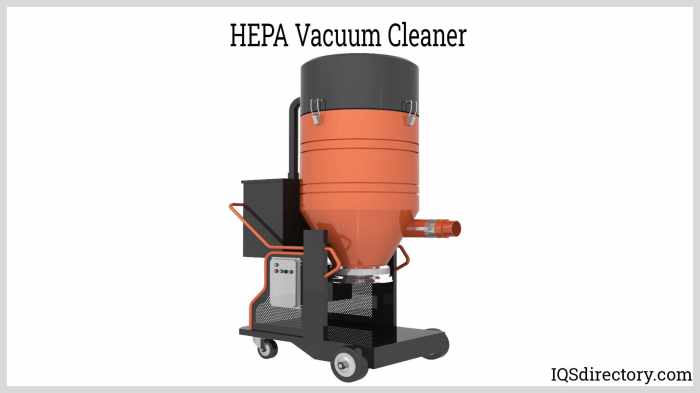
- Vacuum Cleaner with HEPA Filter: For those sneaky spores that try to escape, a vacuum with a HEPA filter ensures they don’t find their way back into your home. It’s like a mold-catching net—catch and release, baby!
Step-by-Step Procedure for Cleaning Mold
Ready to spring into action? Follow these simple steps to clean mold from various surfaces like the mold-fighting champion you are:
1. Prepare the Area
Clear out any furniture or items that may obstruct your mold-fighting mission. Ventilation is key, so open windows and doors to let fresh air flow in.
2. Gear Up
Don your protective gear to safeguard yourself against mold spores. Think of it as your battle armor!
3. Identify the Surface
Different surfaces require different techniques. For instance, wood, drywall, and concrete all have their own cleaning needs.
4. Apply Mold Remover
Spray your chosen mold remover generously on the affected area. Let it soak for a few minutes—this is the equivalent of letting the magic brew!
5. Scrub Away
Using your scrub brush or sponge, go to town on that mold! This is where you get to unleash your inner cleaning warrior.
6. Rinse and Repeat
Wipe the area with clean water to remove any residue, and dry it thoroughly with a towel.
7. Dispose of Waste Properly
Seal any moldy materials in a plastic bag and toss them out. You’re not saving them for a rainy day!
8. Inspect Regularly
Keep an eye on the area for a few weeks. A quick check-up can prevent mold from relapsing—like checking in on an old friend!
Safety Precautions While Using Mold Remover Products
Cleaning mold may seem straightforward, but safety should always be your number one priority. Remember, you’re going into battle against a sneaky foe! Here are some crucial precautions to keep in mind:
- Read Labels: Always read the instructions and safety warnings on mold remover products. This isn’t just a suggestion; it’s your guide to safety!
- Ventilation is Key: Ensure the area is well-ventilated during cleanup. Open windows and turn on fans to keep fresh air circulating—consider it your mold-fighting wind machine!
- Store Chemicals Safely: Keep mold removers out of reach of children and pets. A locked cabinet is ideal—think of it as the fortress of solitude for your cleaning supplies!
- Avoid Mixing Chemicals: Never mix different cleaning agents. This can create toxic fumes that are more dangerous than mold itself. Just say no to wild chemical cocktails!
- Monitor Your Health: If you experience any respiratory issues or allergic reactions during cleanup, stop immediately and seek fresh air. Your health is the top priority in this mold-fighting saga!
Summary
As we wrap up this mold-busting adventure, remember that a clean home is a happy home—or at least a mold-free one! Armed with the knowledge of effective mold remover products, prevention tactics, and essential cleaning tips, you’re now ready to take on any mold challenge that dares to cross your path. So, go forth and reclaim your space from the clutches of mold, and may your cleaning endeavors be as triumphant as a superhero’s victory dance!
FAQ Resource
What is the best natural mold remover?
White vinegar is often hailed as the best natural mold remover due to its acidity, which can kill up to 82% of mold species.
Can I use bleach to remove mold?
Yes, bleach is effective on non-porous surfaces, but it’s not recommended for porous materials as it can foster mold regrowth.
How often should I check for mold in my home?
It’s wise to check for mold every 3-6 months, especially in humid areas like bathrooms and basements.
Is it safe to use chemical mold removers?
When used according to the manufacturer’s instructions and with proper safety precautions, chemical mold removers can be safe.
What’s the best way to prevent mold from coming back?
Keep humidity levels below 60%, ensure proper ventilation, and fix any leaks promptly to thwart mold’s return.