Reinforced concrete the superhero of construction

Reinforced concrete

Welcome to the realm of Reinforced concrete, where steel meets cement in a dazzling dance of durability! Picture this: a construction material so tough it could survive a superhero battle—now that’s some serious construction cred!

Reinforced concrete is like the Swiss Army knife of building materials, combining the best of both worlds: the compressive strength of concrete and the tensile strength of steel. Its unique composition not only makes it resistant to cracking but also allows it to tackle everything from imposing skyscrapers to cozy backyard patios. Let’s take a deep dive into its properties, advantages, and the ways it can transform your home improvement projects into masterpieces!

Reinforced Concrete Basics

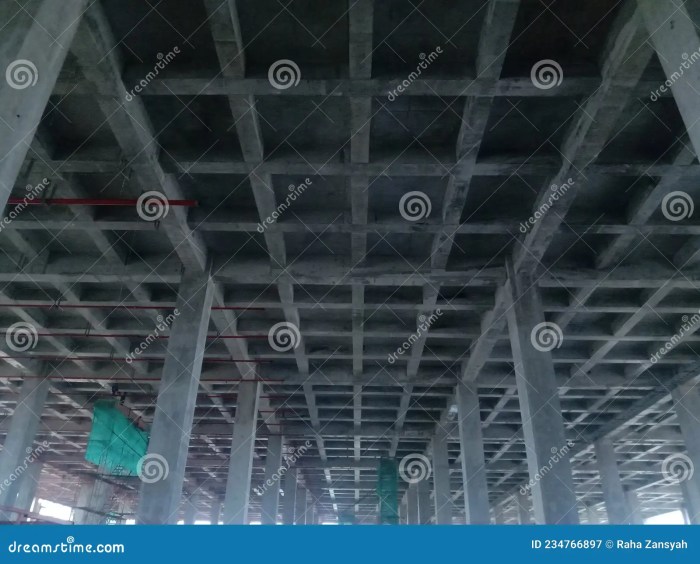
Reinforced concrete is like that ultimate power couple in construction, where concrete’s durability meets steel’s tensile strength. It’s not just a mix of cement, water, and aggregates; it’s a carefully concocted formula that has revolutionized the building industry. If concrete is the foundation of modern architecture, then reinforced concrete is its superhero cape, ready to withstand everything from earthquakes to the weight of heavy machinery.The composition of reinforced concrete is straightforward, yet fascinating.

It starts with concrete—an amalgamation of cement, water, sand, and gravel or crushed stone. But here’s where it gets exciting: embedded within this solid mass are steel reinforcing bars, commonly known as rebar. This steel reinforcement significantly enhances the concrete’s tensile strength, which is its ability to resist being pulled apart. Together, they form a composite material that can endure a variety of stresses while maintaining structural integrity.

Composition and Properties of Reinforced Concrete

The magical properties of reinforced concrete come from its unique composition. The concrete provides compressive strength, meaning it can withstand heavy loads without crushing, while the steel adds tensile strength, preventing the material from cracking under stress.

Compressive Strength

Concrete can easily handle heavy weights, making it ideal for foundations and columns.

Tensile Strength

The rebar absorbs tension, ensuring that the structure remains intact even when forces try to pull it apart.

Durability

Reinforced concrete is resistant to weathering, chemical attacks, and even fire, making it a long-lasting choice for construction projects.

Versatility

It can be molded into various shapes and forms, allowing for creative architectural designs.The synergy between the concrete and steel creates a material that can resist a wide range of environmental challenges, ensuring that buildings can stand the test of time.

Advantages of Using Reinforced Concrete in Construction

Using reinforced concrete is like having your cake and eating it too; it combines the best of both worlds. Here are some reason why construction professionals sing its praises:

Cost-Effectiveness

The long lifespan and low maintenance requirements of reinforced concrete mean that it saves money over time.

Structural Integrity

It provides excellent structural reliability, making it safe for diverse applications—from skyscrapers to bridges.

Fire Resistance

Thanks to the concrete’s non-combustible nature, buildings made from reinforced concrete can withstand high temperatures, offering safety in emergencies.

Sustainability

Many modern reinforced concrete mixes incorporate recycled materials, reducing environmental impact compared to traditional methods.These advantages make reinforced concrete a preferred choice for engineers and architects alike, proving that it’s not just about looking good; it’s about being functional and safe.

Differences Between Reinforced Concrete and Traditional Concrete

While traditional concrete is a fantastic material in its own right, it’s lacking a little something—like a sidekick. Here’s how the two stack up against each other:

Tensile Strength

Traditional concrete can fail under tension, while reinforced concrete can handle it like a champ.

Flexibility in Design

Reinforced concrete allows for more innovative designs due to its enhanced strength and durability.

Weight Bearing

Reinforced concrete can take on much heavier loads compared to traditional concrete, making it suitable for bigger projects.

Resistance to Cracking

Traditional concrete is prone to cracking under stress, whereas reinforced concrete offers a safeguard against such weaknesses.In summary, while traditional concrete has its merits, reinforced concrete is the heavy hitter in the construction world, combining strength, durability, and versatility in a seamless package. It’s the material that builds dreams—one slab at a time!

Applications of Reinforced Concrete in Home Improvement

Reinforced concrete isn’t just for skyscrapers and bridges; it’s the unsung hero of home improvement projects! This versatile material can transform your living space into a fortress of modern design while providing functionality that will make your neighbors green with envy. Let’s explore how you can leverage the sturdy charm of reinforced concrete to boost your home’s aesthetic and practicality.

Home Improvement Projects Utilizing Reinforced Concrete

When it comes to home improvement, reinforced concrete can be your best friend. Not only does it provide strength, but it also offers a polished look that can elevate any project. Here are a few examples of how you can use reinforced concrete in your next home upgrade:

  • Concrete Patios: Say goodbye to boring backyards! With reinforced concrete, you can create an elegant patio that withstands the test of time—perfect for hosting those summer barbecues where overcooked burgers are the only casualties.
  • Driveways: Upgrade your dirt path to a sleek reinforced concrete driveway that will make your car feel like royalty. Plus, it’s resistant to cracking, so you’ll have fewer potholes to dodge during your morning commute!
  • Foundations: For new home constructions or renovations, a reinforced concrete foundation is a solid choice. It provides superior stability, making your home as sturdy as a tank—minus the cannon, of course!
  • Retaining Walls: If your garden looks like a rollercoaster ride, consider incorporating reinforced concrete retaining walls. They not only hold back soil but can be styled to enhance your landscape like a model on a runway.

Incorporating Reinforced Concrete into Landscaping Designs

If you’re looking for a way to impress your guests before they even step through the front door, landscaping with reinforced concrete is the way to go. Here are some creative techniques to consider:

  • Concrete Pathways: Lay down reinforced concrete pathways that not only guide the way to your door but look fabulous doing it. Incorporate stamped designs for a decorative touch that mimics stone or brick without the hefty price tag.
  • Garden Borders: Use reinforced concrete to create sleek borders around your flowerbeds. This not only defines your garden space but helps keep pesky weeds at bay, allowing your tulips to shine like the stars they are.
  • Water Features: Build a stunning fountain or pond using reinforced concrete. Not only will it add a touch of tranquility to your garden, but the durability of the material ensures it can handle whatever Mother Nature throws at it—rain, shine, or the occasional curious raccoon.

Energy Efficiency Enhancement in Home Construction

Reinforced concrete does more than just look good; it can significantly improve the energy efficiency of your home. Its thermal mass properties help regulate indoor temperatures, reducing the need for constant heating or cooling. Here’s how it can save you some green:

  • Insulation: When combined with proper insulation techniques, reinforced concrete walls can keep your home warmer in winter and cooler in summer. This means more time in shorts and flip-flops, regardless of the season!
  • Reduced Energy Bills: A well-insulated concrete home can lead to lower energy bills. Think of it as an investment in your future self, who won’t have to cringe every time they open that utility statement.
  • Durability: Reinforced concrete’s longevity means fewer repairs and replacements over time, making it an eco-friendly choice. It’s like going green while giving a high-five to your bank account!

Tips for Working with Reinforced Concrete in Home and Woodworking

Reinforced concrete

When it comes to working with reinforced concrete, it’s a mixed bag of tools, techniques, and a sprinkle of finesse. Think of it as baking a cake—but instead of flour and eggs, you have cement and steel. The following segments will help transform your concrete dreams into reality, with a dash of humor and a side of safety. Dive in and let’s make concrete fun—yes, you read that right!

Essential Tools and Materials Needed for Reinforced Concrete Projects

Before you start whipping up that concrete masterpiece, you’ll want to gather your tools and materials. Here’s a handy list that will have you feeling like a concrete Picasso in no time:

  • Cement: The star of the show! Choose Portland cement for most projects.
  • Aggregates: Gravel and sand are your reliable sidekicks, providing strength and bulk.
  • Steel Reinforcement Bars (Rebar): Think of these as the backbone of your structure, making it strong and resilient.
  • Concrete Mixer: Because hand-mixing is great for a workout but not for a solid foundation!
  • Shovels, Trowels, and Buckets: Essential for the mixing and pouring process—no one wants cement on their favorite shoes.
  • Measuring Tools: Level, tape measure, and square to keep everything straight (unlike your cousin Vinny at family gatherings).
  • Protective Gear: Safety glasses, gloves, and a dust mask to protect yourself—this isn’t a beauty contest!

Safe Handling and Mixing Procedures for Reinforced Concrete

Safety first! Mixing concrete can be a bit messy (and heavy), so it’s important to follow safe handling procedures. Here’s how to keep yourself and your loved ones safe while tackling that concrete project:

Always wear safety gear. Your eyes and lungs will thank you!

When mixing concrete, start by measuring your materials. Use a 1:2:3 ratio of cement, sand, and gravel with enough water to create a thick, pudding-like consistency.

  • Step 1: Use a wheelbarrow or concrete mixer for blending. No one wants to do the heavy lifting by hand unless you enjoy the gym a little too much!
  • Step 2: Pour your dry ingredients first, then add water slowly while mixing. This is not a race—gently does it!
  • Step 3: Mix until you have a uniform color and consistency. If it’s too dry, add a bit more water. If it’s too runny, add more aggregates. You’re aiming for Goldilocks levels of just right!
  • Step 4: Use tools to scoop the mixture into molds or forms. Remember to keep your workspace clean to avoid foot-juggling cement balls!

Step-by-Step Guide for Building Reinforced Concrete Structures in Home Settings

Building reinforced concrete structures can be a rewarding project, akin to building a fortress. Here’s your step-by-step guide, so you can feel like a construction boss:

Measure twice, mix once—your structure will thank you!

  1. Design Your Structure: Plan your dimensions and layout. Use graph paper or software to sketch it out. Your future self will appreciate the foresight!
  2. Prepare the Site: Clear the area of debris and vegetation. No one wants an unexpected shrub in their concrete!
  3. Create Forms: Construct molds from plywood or other materials to hold your concrete in shape while it sets. Ensure they are sturdy, as concrete is heavier than it looks!
  4. Install Rebar: Cut and place rebar within the forms, ensuring it is secure and positioned correctly. This is like giving your structure a great pair of steel bones!
  5. Mix and Pour Concrete: Once mixed, pour the concrete into the forms. Use a trowel to spread it evenly and eliminate air bubbles—imagine it’s a pizza crust!
  6. Finishing Touches: Smooth the surface with a trowel and let it set. Remember, patience is key here—no hammering, just let it chill!
  7. Curing: Keep the concrete moist for several days. This helps it harden properly, resulting in a strong finish. Think of it as a spa day for your concrete!

Conclusive Thoughts

Reinforced concrete

In conclusion, Reinforced concrete isn’t just a boring construction term; it’s your trusty sidekick in the fight against flimsy building materials! With its versatility and strength, it empowers DIY enthusiasts and professional builders alike to create stunning and enduring structures. So next time you think of home improvement, remember: with Reinforced concrete at your side, the sky is the limit—no cape required!

Common Queries

What is the main advantage of reinforced concrete?

The main advantage of reinforced concrete is its ability to handle tension and compression, making it far stronger and more durable than traditional concrete.

Can I use reinforced concrete for outdoor projects?

Absolutely! Reinforced concrete is perfect for outdoor projects like patios, pathways, and retaining walls due to its weather resistance.

What tools do I need to work with reinforced concrete?

Essential tools include mixing equipment, trowels, and molds. Safety gear, like gloves and goggles, is also a must!

How long does reinforced concrete take to cure?

Typically, reinforced concrete takes about 28 days to fully cure, but you can usually start working on it after a week.

Is reinforced concrete energy-efficient?

Yes, it can enhance energy efficiency by providing better insulation compared to traditional materials, helping to keep homes cooler in summer and warmer in winter.

Concrete countertops the stylishly sturdy choice

Concrete countertops

Picture this: a countertop that’s not only as tough as a superhero but also as stylish as a runway model. Welcome to the world of concrete countertops, where functionality meets fabulousness! If you think concrete is just for sidewalks and parking lots, think again—these bad boys are here to transform your kitchen and bathroom into the sleekest spaces in your home.

With an endless array of styles and finishes, concrete countertops are the ultimate chameleons of home design, adapting seamlessly to any aesthetic you desire. Plus, their durability can withstand the chaos of everyday life, while still being easy to maintain. Get ready to dive into this concrete jungle of creativity!

Concrete Countertops Overview

Concrete countertops

Concrete countertops are the unsung heroes of modern home design, bringing a touch of industrial chic to your kitchen or bathroom while also being as tough as an old-school wrestler. Not only do they stand out in a crowd, but they also offer a winning combination of versatility, durability, and style. Imagine a surface that can handle the daily hustle and bustle of life, all while looking like a million bucks—yes, please!The benefits of using concrete countertops in home design are numerous.

First, they are highly customizable. You can choose from a variety of colors, textures, and finishes that fit your aesthetic—whether you’re going for sleek and modern or rustic and cozy. Additionally, concrete is resistant to heat, which means you can place that hot pot right on the countertop without fear of it leaving a mark. Talk about a tough surface! Plus, they are non-porous if sealed correctly, helping to resist stains and spills.

Styles and Finishes Available for Concrete Countertops

When it comes to styles and finishes, concrete countertops are like a chameleon that changes colors to fit your mood. From polished perfection to rough-hewn rustic charm, the options are nearly endless. Here are some of the most popular styles and finishes that will have you pondering over your dream countertop:

  • Polished Concrete: This finish is as smooth as a jazz tune on a Sunday morning. It reflects light beautifully and is perfect for a modern aesthetic.
  • Textured Finishes: Featuring various textures, this style can mimic the look of wood, stone, or even fabric. Think of it as concrete’s way of saying, “Look at me! I’m interesting!”
  • Color-Stained Concrete: Want to add a splash of personality? Color stains allow you to infuse vibrant hues into your countertop, making it a true showstopper.
  • Exposed Aggregate: For those who like a bit of grit in their lives, exposed aggregate showcases the natural stones mixed into the concrete, resulting in a unique look.

The durability of concrete countertops is another feather in their cap. These countertops are tougher than a two-dollar steak, able to withstand the wear and tear of daily life. However, it’s essential to keep up with maintenance. Regular sealing is necessary to protect against stains and scratches, which ensures your concrete countertop maintains its beauty for years to come. Remember, a little love goes a long way!

Concrete countertops: where style meets strength, and your kitchen gets a superhero upgrade!

Home Improvement with Concrete

Concrete countertops

Concrete countertops aren’t just a trend; they’re a testament to your ability to transform your kitchen into a culinary wonderland—complete with a touch of modern art. With the right tools, a sprinkle of patience, and maybe a YouTube tutorial or two, you can craft countertops that are as tough as your morning coffee routine. So, let’s dive into the nuts and bolts of installing these fabulous surfaces and avoid the mishaps that would make even a seasoned DIY-er cringe.

Steps for Installing Concrete Countertops

Installing concrete countertops isn’t a mere weekend project; it’s an adventure that involves mixing, pouring, and possibly a little bit of laughter (or crying, depending on your experience level). Here’s how to get from bare cabinets to a stunning concrete surface:

1. Measure and Plan

Start by measuring your cabinets and sketching a plan. Make sure to factor in sink cutouts and any funky angles—because who doesn’t love a little challenge?

2. Build the Forms

Use melamine boards to create a mold that matches your desired countertop shape. Think of it as building a tiny concrete kingdom!

3. Prepare the Concrete Mix

Combine the concrete mix with water in a large bucket. You’ll want it to be pancake batter consistency—thicker than your ex’s excuses.

4. Pour the Concrete

Pour the mixed concrete into the forms, spreading it evenly. A trowel will be your best friend during this stage.

5. Vibrate the Concrete

Use a vibrating tool or even a simple sledgehammer under the forms to help eliminate air bubbles. It’s like giving your concrete a little dance party!

6. Cure the Concrete

Cover the molds with plastic sheeting to keep moisture in while it cures. This is where the magic happens—be patient!

7. Demold and Finish

Once cured, carefully remove the forms. Sand any rough edges and polish to perfection for that glorious shine.

Essential Tools and Materials for Concrete Countertop Installation

Before you dive headfirst into your project, gather your tools and materials. This list will ensure you have everything at your fingertips, so you’re not left mid-project, Googling “local hardware stores.” Here’s what you’ll need:

  • Concrete mix (the magic potion)
  • Water (the life source)
  • Melamine boards (for forms)
  • Trowel (for smoothing things out)
  • Mixer (manual or electric, depending on your commitment level)
  • Vibrating tool or sledgehammer (for bubble busting)
  • Sandpaper or concrete grinder (for finishing touches)
  • Plastic sheeting (the conserving superhero)
  • Measuring tape (for precision)
  • Level (to avoid the ‘slanted countertop’ syndrome)
  • Safety gear (because concrete doesn’t care about your health)

Common Mistakes to Avoid When Working with Concrete

Embarking on a concrete countertop project is like juggling flaming torches; it’s exhilarating but can go horribly wrong if you aren’t careful. Here are the common pitfalls to sidestep on your journey to countertop glory:

Neglecting to Measure Twice

If you think “close enough” is good enough, think again. In the world of concrete, proper measurements are your best friend.

Rushing the Curing Process

Patience isn’t just a virtue; it’s a must. Don’t skimp on curing time; otherwise, you might end up with cracks that could rival the Grand Canyon.

Poor Mixing Techniques

Too wet or too dry is a concrete no-no. Find that sweet spot!

Ignoring Safety Gear

Remember, concrete dust isn’t your new best friend; wear a mask and goggles, or you might end up sneezing like you just inhaled a bag of flour.

Skipping the Vibrating Step

Air bubbles are not cute. Make sure to vibrate your concrete to achieve a smooth finish.

Integrating Concrete into Home Design

Concrete countertops have transitioned from industrial spaces to the heart of modern homes, effortlessly blending aesthetic appeal with practicality. Integrating concrete into your home design isn’t just a trend—it’s a revolution in style and functionality. Whether you’re eyeing a sleek, minimalist kitchen or a rustic farmhouse vibe, concrete can be your versatile sidekick.

Comparison of Concrete Countertops with Other Countertop Materials

When it comes to choosing countertops, homeowners often find themselves at a crossroads, pondering whether to go for granite, quartz, or the stunning allure of concrete. Each material has its own personality, and understanding the differences can help you decide which one is ready to take center stage in your kitchen.

  • Durability: Concrete countertops are reinforced with steel and can withstand hot pots and heavy impacts, while granite is also quite durable but can chip if treated poorly. Quartz, being engineered, offers decent durability, although it is less heat resistant than both concrete and granite.
  • Maintenance: Concrete needs sealing to prevent stains, but once sealed, it’s relatively low-maintenance. Granite also requires periodic sealing, while quartz is often touted as the easy-care option—just don’t go introducing it to high-heat situations!
  • Design Flexibility: Concrete countertops are custom-made, allowing for infinite shapes and colors. Granite and quartz come in a variety of patterns, but the natural variations in concrete can offer a unique touch that’s hard to replicate.
  • Cost: While prices can vary based on design complexity, generally, concrete can be more affordable than high-end granite or quartz, making it a budget-friendly hero in your kitchen renovation saga.

Concrete countertops: where toughness meets style in a fabulous affair!

Pairing Concrete Countertops with Appliances and Fixtures

Choosing the right appliances and fixtures to complement your concrete countertops can elevate your home design from ‘meh’ to ‘magnificent.’ Here’s a guide to ensure your selections harmonize beautifully with the concrete vibe:

Stainless Steel Appliances

Their sleek finish pairs perfectly with the raw texture of concrete, creating an industrial-chic look that screams modernity.

Wooden Fixtures

Warm wood accents provide a beautiful contrast to the coldness of concrete, making for a cozy kitchen atmosphere.

Bold Colors

If you’re feeling adventurous, opt for colorful kitchen gadgets and fixtures. Bright hues against a neutral concrete backdrop can create an eye-catching focal point.

Minimalist Hardware

Choose simple, understated cabinet handles and faucets that won’t compete with the boldness of your concrete. Think sleek lines and subtle finishes.

Remember, in design, balance is key—too much flair can lead to a fashion disaster!

Enhancing Energy Efficiency with Concrete Countertops

Concrete isn’t just a pretty face; it’s also a savvy choice for energy efficiency in your home design. Its thermal mass properties allow it to absorb heat during the day and release it slowly at night, helping to moderate indoor temperatures. This means a more stable climate in your kitchen without relying heavily on air conditioning or heating systems.

Insulation Benefits

When paired with proper insulating materials, concrete can enhance energy conservation. It helps keep your home cooler in summer and warmer in winter, reducing energy costs.

Sustainable Material

Many concrete mixes now include recycled materials, making them an eco-friendly choice that helps reduce your carbon footprint while enhancing your home’s efficiency.

Longevity

Concrete countertops can last a lifetime if properly cared for, reducing the need for replacements and the resources that come with them.

Concrete isn’t just strong; it’s smart—making your home energy-efficient while looking fabulous!

Final Wrap-Up

So, there you have it! Concrete countertops are not just a trend; they are a bold statement in home design that combines resilience with artistic flair. Whether you’re cooking up a storm or just enjoying a cup of coffee while admiring your new surface, these countertops are here to elevate your space and energy efficiency. Embrace the concrete revolution and let your kitchen shine brighter than ever!

Helpful Answers

How long do concrete countertops last?

With proper care and maintenance, concrete countertops can last a lifetime, making them a great long-term investment!

Are concrete countertops easy to clean?

Absolutely! A simple soap and water solution will keep them looking sharp. Just avoid harsh chemicals!

Can I customize the color of my concrete countertops?

Yes, you can! Concrete can be tinted in a variety of colors to match your decor perfectly.

Do concrete countertops stain easily?

While they can stain, a good sealant will help protect them from spills and messes.

Are concrete countertops good for outdoor use?

Definitely! They are durable enough to withstand the elements when properly sealed.

Mold remover the hero your home needs to fight mildew

Mold remover

In the epic battle against the insidious villain known as mold, the unsung hero is none other than our trusty mold remover! Picture this: your bathroom, once a serene oasis, now resembling a swampy jungle thanks to unwanted guests like mildew. Fear not! With a trusty mold remover by your side, you can transform that moldy mess into a sparkling sanctuary.

Mold removers come in all shapes and sizes—from natural potions brewed in your kitchen to chemical concoctions that make your cleaning dreams come true. Whether you’re a DIY warrior or a home improvement novice, understanding how to choose the right mold remover for your specific surfaces is crucial. So, buckle up, grab your cleaning gear, and let’s dive into the world of mold removal like it’s a tropical vacation—minus the moldy beach towels!

Mold Remover Products

Mold remover

Mold is the uninvited guest that just won’t leave your home, lurking in damp corners and dark spaces. Thankfully, there’s a whole arsenal of mold remover products ready to battle this stubborn foe! From natural solutions to chemical warriors, the marketplace is brimming with options that promise to evict mold with the efficiency of a bouncer at a nightclub. Let’s dive into the realm of mold removers and explore what’s hot (and not) in the fight against fungi.

Effective Mold Remover Products

Various mold remover products are available that cater to different needs and preferences. These options can be classified into natural and chemical categories, each offering unique benefits. Understanding these products helps in choosing the best fit for your particular mold dilemma. Here’s a roundup of some of the most effective mold remover products:

  • Concrobium Mold Control: A non-toxic solution that eliminates mold using a patented technology to encapsulate and remove spores. No bleach, no fuss—just mold removal that won’t leave you gasping for air!
  • RMR-86 Instant Mold Stain Remover: This chemical marvel works like magic, eliminating stains in seconds. Just spray, wait a minute, and watch those pesky spots vanish as if they were never there!
  • EcoSMART Organic Mold Killer: For the eco-warriors among us, this product offers a natural formula that’s tough on mold but gentle on the environment. Smells pleasant too—no more toxic cloud while you clean!
  • Clorox Mold & Mildew Remover: A classic in the mold-busting world, this bleach-based option is effective but requires careful handling. It’s like bringing a bazooka to a knife fight—effective, but handle with care!

Natural vs. Chemical Mold Removers

The age-old debate of natural vs. chemical mold removers can be as heated as a sauna! While both types have their merits, knowing the pros and cons of each can guide your choice. Natural mold removers, like vinegar and baking soda, offer a gentle yet effective way to combat mold without harsh chemicals. They’re eco-friendly and safe for most surfaces, but may require a bit more elbow grease and time.

On the other hand, chemical mold removers deliver rapid results, cutting through mold and mildew like a hot knife through butter. However, they often come with strong odors and safety precautions.In summary:

  • Natural Products: Safe, eco-friendly, and usually non-toxic, but may need repeated applications.
  • Chemical Products: Fast-acting and powerful, but can be hazardous if not used properly.

Choosing the Right Mold Remover

Selecting the appropriate mold remover depends on the surfaces and materials you’re dealing with. For instance, using bleach on porous materials can be like trying to use a sledgehammer to crack a nut—overkill! Here’s a breakdown of how to match your mold remover to different surfaces:

  • Wood Surfaces: Opt for a natural or specialized mold remover to prevent damage. Using harsh chemicals could warp or discolor the wood.
  • Tiled Surfaces: Most chemical mold removers work well here. For grout, consider a product specifically designed for tile and grout cleaning.
  • Fabric and Upholstery: Steer clear of bleach! Look for gentle, natural solutions that can penetrate fibers without causing harm.
  • Bathrooms and Kitchens: These high-moisture areas can benefit from either type. Chemical products can quickly eliminate mold in these places, but ensure good ventilation to avoid inhaling harsh fumes.

“A clean space is a happy place—especially when it’s mold-free!”

Home Improvement and Mold Prevention

Mold might think it’s the uninvited guest at every home party, but with the right home improvement strategies, you can send it packing! Mold thrives in damp nooks and crannies, especially in areas like bathrooms and basements, where humidity is often higher than a cat on a hot tin roof. Let’s dive into some savvy ways to keep your home mold-free and moisture levels in check, so you can enjoy a fresher, healthier living space.

Methods to Prevent Mold Growth

Preventing mold growth starts with understanding where it loves to hang out. Here are some effective methods to thwart its ambitions in critical areas of your home:

  • Ventilate Your Bathroom: Ensure your bathroom is as well-ventilated as a bakery on a busy Sunday morning. Install exhaust fans to whisk away steam and humidity, and open windows whenever possible to let in fresh air.
  • Banish the Basement Blues: Basements can be mold’s playground; keep them dry by sealing cracks in walls and floors. A dehumidifier can act like a bouncer, keeping the moisture out and the air dry.
  • Gutter Maintenance: Clean your gutters regularly, like you would dust off your grandma’s favorite knick-knack. Blocked gutters can lead to water pooling around your foundation, giving mold a VIP pass to your home.
  • Use Mold-Resistant Products: When renovating, opt for mold-resistant drywall and paint, letting mold know it’s not welcome in your newly spruced-up spaces.
  • Monitor Humidity Levels: Keep indoor humidity between 30% and 50%, a sweet spot that keeps mold feeling left out. Use hygrometers to keep an eye on moisture levels, as they’re like the home’s health monitors.

Essential Home Improvements to Minimize Moisture

Investing in key home improvements can significantly reduce moisture and humidity levels in your home. Here’s a handy guide to bolster your defenses against unwanted mold growth:

  • Install Proper Insulation: Insulate walls and ceilings with materials designed to fight moisture, keeping warm air in and cold air out – it’s like wrapping your home in a cozy blanket!
  • Upgrade Drainage Systems: Ensure your yard slopes away from your home, directing rainwater to where it can party freely in the ground, far from your foundation.
  • Upgrade to Energy-Efficient Windows: Double-pane windows not only save on energy bills but also reduce condensation buildup inside your home, creating an inhospitable environment for mold.
  • Seal Windows and Doors: Caulk around windows and doors like icing on a cake to prevent rain and humidity from sneaking inside. It’s a simple fix that can save you a moldy mess later!
  • Regular Maintenance Checks: Schedule routine maintenance checks of your home’s plumbing and roofing to catch leaks before they become mold’s new favorite hangout.

Mold Risk Assessment Checklist for Homeowners

Assessing mold risks in your property is crucial for a mold-free living environment. Below is a checklist to help homeowners identify potential mold problems:

  • Check for Visible Mold: Look for dark spots in damp areas like bathrooms, kitchens, and basements.
  • Inspect for Water Damage: Examine walls, ceilings, and floors for signs of water stains or bubbling paint.
  • Monitor Humidity Levels: Regularly check humidity levels with a hygrometer; anything above 50% is a red flag.
  • Assess Ventilation: Ensure all rooms are properly ventilated, especially those where moisture accumulates.
  • Look for Condensation: Check windows, pipes, and walls for condensation, which can indicate too much moisture.

“An ounce of prevention is worth a pound of cure, especially when it comes to keeping mold at bay!”

Cleaning Tips and Tools for Mold Removal

Mold remover

Mold may feel like that uninvited guest who’s overstaying their welcome, but don’t worry—it’s time to show them the door! With the right tools and a pinch of humor, you can boot mold from your space faster than you can say “I should’ve bought that dehumidifier sooner!” Let’s dive into the essential cleaning tips and tools that will have your home mold-free and looking spick-and-span.

Essential Cleaning Tools and Equipment

When it comes to tackling mold, you need the right arsenal. Think of it as gathering your superhero squad—the more equipped you are, the better your chances of victory! Here’s a list of must-have tools that will help you banish mold like a boss:

  • Protective Gear: Before you start your mold-fighting mission, don your superhero attire! This includes gloves, goggles, and a mask. Trust us, you don’t want to be inhaling those sneaky spores!
  • Scrub Brushes: Get ready to scrub-a-dub! A stiff-bristle brush is perfect for textured surfaces, while a sponge works wonders on smoother areas. Think of it as a mini workout—your arms will thank you later.
  • Spray Bottles: Fill these babies with your chosen mold remover solution. A good spray bottle allows you to evenly distribute your cleaning concoction without turning it into a science experiment gone wrong.
  • Bucket: For rinsing and soaking sponges or brushes, a trusty bucket is essential. Plus, it can double as a makeshift stool if you need to reach those hard-to-get spots (just don’t get too comfortable!).
  • Vacuum Cleaner with HEPA Filter: For those sneaky spores that try to escape, a vacuum with a HEPA filter ensures they don’t find their way back into your home. It’s like a mold-catching net—catch and release, baby!

Step-by-Step Procedure for Cleaning Mold

Ready to spring into action? Follow these simple steps to clean mold from various surfaces like the mold-fighting champion you are:

1. Prepare the Area

Clear out any furniture or items that may obstruct your mold-fighting mission. Ventilation is key, so open windows and doors to let fresh air flow in.

2. Gear Up

Don your protective gear to safeguard yourself against mold spores. Think of it as your battle armor!

3. Identify the Surface

Different surfaces require different techniques. For instance, wood, drywall, and concrete all have their own cleaning needs.

4. Apply Mold Remover

Spray your chosen mold remover generously on the affected area. Let it soak for a few minutes—this is the equivalent of letting the magic brew!

5. Scrub Away

Using your scrub brush or sponge, go to town on that mold! This is where you get to unleash your inner cleaning warrior.

6. Rinse and Repeat

Wipe the area with clean water to remove any residue, and dry it thoroughly with a towel.

7. Dispose of Waste Properly

Seal any moldy materials in a plastic bag and toss them out. You’re not saving them for a rainy day!

8. Inspect Regularly

Keep an eye on the area for a few weeks. A quick check-up can prevent mold from relapsing—like checking in on an old friend!

Safety Precautions While Using Mold Remover Products

Cleaning mold may seem straightforward, but safety should always be your number one priority. Remember, you’re going into battle against a sneaky foe! Here are some crucial precautions to keep in mind:

  • Read Labels: Always read the instructions and safety warnings on mold remover products. This isn’t just a suggestion; it’s your guide to safety!
  • Ventilation is Key: Ensure the area is well-ventilated during cleanup. Open windows and turn on fans to keep fresh air circulating—consider it your mold-fighting wind machine!
  • Store Chemicals Safely: Keep mold removers out of reach of children and pets. A locked cabinet is ideal—think of it as the fortress of solitude for your cleaning supplies!
  • Avoid Mixing Chemicals: Never mix different cleaning agents. This can create toxic fumes that are more dangerous than mold itself. Just say no to wild chemical cocktails!
  • Monitor Your Health: If you experience any respiratory issues or allergic reactions during cleanup, stop immediately and seek fresh air. Your health is the top priority in this mold-fighting saga!

Summary

As we wrap up this mold-busting adventure, remember that a clean home is a happy home—or at least a mold-free one! Armed with the knowledge of effective mold remover products, prevention tactics, and essential cleaning tips, you’re now ready to take on any mold challenge that dares to cross your path. So, go forth and reclaim your space from the clutches of mold, and may your cleaning endeavors be as triumphant as a superhero’s victory dance!

FAQ Resource

What is the best natural mold remover?

White vinegar is often hailed as the best natural mold remover due to its acidity, which can kill up to 82% of mold species.

Can I use bleach to remove mold?

Yes, bleach is effective on non-porous surfaces, but it’s not recommended for porous materials as it can foster mold regrowth.

How often should I check for mold in my home?

It’s wise to check for mold every 3-6 months, especially in humid areas like bathrooms and basements.

Is it safe to use chemical mold removers?

When used according to the manufacturer’s instructions and with proper safety precautions, chemical mold removers can be safe.

What’s the best way to prevent mold from coming back?

Keep humidity levels below 60%, ensure proper ventilation, and fix any leaks promptly to thwart mold’s return.

Vacuum cleaner the ultimate dirt-busting hero

Vacuum cleaner

If cleanliness is next to godliness, then vacuum cleaners are the divine sidekicks in our battle against dust bunnies! These handy contraptions have evolved from clunky, horse-drawn devices to sleek, robotic warriors that make cleaning a breeze. In this delightful journey, we’ll traverse the fascinating history and evolution of vacuum cleaners, explore the types that fit every cleaning style, and uncover the must-have features to help you choose your new best friend in home maintenance.

Whether you’re dealing with pet hair that could fill a small zoo or just trying to keep your floors free of crumbs from that snack attack last night, there’s a vacuum cleaner out there designed just for you. From uprights that stand tall to canisters that can roll with the punches, every variety has its own unique flair and function.

Let’s dive into this dust-busting world and discover how to keep our homes spick and span!

Home Appliances

Vacuum cleaners have come a long way from the noisy and bulky contraptions of yesteryear to the sleek, high-tech devices we now rely on to keep our homes spick and span. Once considered a luxury, these essential home appliances have evolved into must-have gadgets that make dusty carpets quiver in fear. As we glide through this journey of vacuum cleaner evolution, let’s delve into the various types available today and the features that can turn your cleaning chaos into a smooth operation.

Types of Vacuum Cleaners

Understanding the different types of vacuum cleaners can help you choose the right one for your cleaning needs. Each type comes with its own set of pros and cons, much like your favorite sitcom character. Here’s a comparison to get you started:

Below is a comparison of the three main types of vacuum cleaners:

Type Description Pros Cons
Upright These are the classic vacuum cleaners that stand tall and mighty. Powerful suction, great for carpets, often have larger dirt bins. Can be heavy and difficult to maneuver in tight spaces.
Canister These come with a separate canister and hose, making them versatile. Lightweight, easy to carry, great for hard-to-reach areas. Can be cumbersome to drag around the house.
Robot The futuristic helpers that whiz around your floors autonomously. Hands-free operation, perfect for daily maintenance. Limited suction power, can miss corners and edges.

Features to Consider When Purchasing a Vacuum Cleaner

When it comes to vacuum cleaners, features can make a world of difference. Selecting the right vacuum is like choosing the right superhero; you want one that can save the day effectively and efficiently. Here are some essential features to ponder before making a purchase:

The following features are crucial when deciding on the best vacuum cleaner:

  • Suction Power: The more suction, the better the dirt and dust battle results.
  • Filtration System: HEPA filters capture allergens, making the air cleaner for everyone.
  • Weight: A lightweight vacuum means less strain on your muscles and more on your cleaning game.
  • Attachments: The right tools can help tackle pet hair, upholstery, and hard-to-reach spots.
  • Noise Level: A quieter vacuum means less noise pollution in your household, especially during late-night cleaning sprees.

“The right vacuum cleaner transforms cleaning from a chore into a triumphant adventure!”

Cleaning Tips and Tools

When it comes to keeping our homes as fresh as a daisy, vacuum cleaners are our trusty sidekicks, battling the dirt and dust that dare to invade our sacred spaces. However, not all heroes wear capes; some come with a powerful motor and a dustbin! To make the most of your vacuum, it’s essential to understand effective cleaning techniques, proper maintenance, and avoid common pitfalls.

Let’s unleash the full potential of your vacuum and make cleaning a breeze – or at least less of a chore!

Effective Cleaning Techniques Using Vacuum Cleaners

Using a vacuum cleaner effectively can transform your cleaning routine from a back-breaking exercise into a surprisingly efficient task. Different surfaces require different techniques to ensure every nook and cranny is spotless. Here’s how you can tackle various surfaces like a cleaning ninja:

Hard Floors

For tiles, hardwood, or laminate, sweep the floor first to gather larger debris. Then use your vacuum’s hard floor setting, which allows the brush roll to remain stationary and prevents scratching.

Carpets

Adjust your vacuum to the carpet setting to engage the brush roll, which helps lift dirt from deeper fibers. For high-pile carpets, use slow and steady passes to give the vacuum time to grab every speck.

Upholstery

Use the upholstery attachment to suck up crumbs and pet hair. Remember to vacuum from top to bottom to ensure any debris falls to the lower parts for easy clean-up.

Stairs

Use a handheld vacuum or the hose attachment to navigate each step. Employ an upward motion while vacuuming to prevent any dirt from rolling back down.

“A clean home is a happy home, and your vacuum is the unsung hero in this quest!”

Maintenance Procedures for Optimal Vacuum Performance

To keep your vacuum cleaner purring like a kitten, regular maintenance is crucial. Think of it as a spa day for your cleaning companion. Here’s how to pamper your vacuum and keep it in tip-top shape:

Empty the Dustbin Regularly

A full bin can reduce suction power. Aim to empty it once it’s about two-thirds full.

Clean or Replace Filters

Most vacuums have filters that need a good cleaning or replacement every 3-6 months. This boosts performance and keeps allergens at bay.

Check the Brush Roll

Hair and debris can get tangled in the brush roll. Clear this out regularly to maintain maximum cleaning power.

Inspect Hoses for Clogs

A blocked hose can lead to poor suction. Shine a flashlight through the hose to ensure there are no obstructions.

Common Mistakes When Using Vacuum Cleaners

Even the best of us can trip over our own two feet – metaphorically speaking, of course, when it comes to vacuuming. Here are some common blunders to avoid for a smoother cleaning experience:

Vacuuming Too Quickly

Rushing through the job means dirt gets left behind. Slow and steady wins the race!

Using the Wrong Attachments

Using the wrong nozzle can lead to ineffective cleaning. Always match the attachment to the surface you’re tackling.

Neglecting Regular Maintenance

Forgetting to clean filters or empty the dustbin can lead to decreased efficiency and burnout. Treat your vacuum with the love it deserves!

Vacuuming Wet Spills

Unless your vacuum is wet/dry rated, avoid sucking up liquid messes, which can cause damage and even mold growth.

“The vacuum is a mighty tool, but only if you wield it wisely!”

Home Improvement

Vacuum cleaner

Imagine a home that sparkles like a diamond, where every corner gleams, and the air feels as fresh as a spring day. A vacuum cleaner isn’t just a cleaning appliance; it’s your trusty sidekick in the battle against dust bunnies and pet hair. With its powers combined, you can transform your living space into a sanctuary of cleanliness and comfort.

But let’s not forget that not all vacuum cleaners are created equal—some are like the superheroes of home improvement, while others are more like that sidekick who can’t quite keep up with the action.Vacuum cleaners play an essential role in maintaining overall home cleanliness and enhancing comfort by ensuring that allergens, dirt, and microscopic monsters are banished from your living space.

A clean home not only looks good but also feels good—imagine walking barefoot on a clean floor instead of performing a version of ‘hot lava’ on a carpet of crumbs. Regularly using a vacuum helps improve air quality by reducing dust mites, pet dander, and other allergens that can trigger sneezes and sniffles. So, a vacuum cleaner doesn’t just clean; it contributes to a healthier, happier home environment.

Energy-Efficient Vacuum Cleaners

When it comes to home improvement, energy efficiency is the cherry on top of the cleanliness sundae. Energy-efficient vacuum cleaners are like the eco-friendly superheroes of the cleaning world; they save the planet and your wallet at the same time. These marvels are designed to use less electricity while still delivering powerful suction. With many models now boasting Energy Star ratings, it’s easier than ever to find a vacuum that cleans up your home without leaving a dent in your energy bills.Investing in energy-efficient vacuums not only helps you save money but also contributes to reducing your carbon footprint.

Picture this: while you’re zipping around your home with your energy-efficient vacuum, you’re happily saving the environment one dust bunny at a time. It’s a win-win situation!Here’s a handy list of recommended vacuum cleaners tailored to various home needs:

Need a vacuum cleaner that tackles specific challenges? Look no further. Here’s a curated selection based on different home requirements:

  • Pet Hair: The Bissell Pet Hair Eraser is a vacuum designed specifically for pet owners, featuring powerful suction and tangle-free technology to keep those pesky furballs at bay.
  • Allergies: The Dyson V11 Allergy is engineered to capture 99.97% of particles as small as 0.3 microns, ensuring fresh air and relief for allergy sufferers.
  • Hardwood Floors: The Shark Rocket Corded Hand Vac with its lightweight design and specialized brush rolls effectively cleans hardwood floors without scratching.
  • Carpets: The Hoover Power Drive Pet Bagless Upright Vacuum provides powerful deep cleaning capabilities on carpets, making it a favorite among homeowners seeking that plush carpet feel.

Invest in the right vacuum cleaner today, and you’ll be cleaning with confidence tomorrow!

End of Discussion

Vacuum cleaner

So there you have it—your ultimate guide to vacuum cleaners! Armed with the knowledge of their evolution, types, and maintenance tips, you’re now equipped to tackle any mess with confidence and a dash of humor. Remember, a clean home is a happy home, so enlist the help of these nifty machines to keep your space sparkling—and your sanity intact. Now get out there and vacuum like there’s no tomorrow!

Q&A

How often should I vacuum my home?

Ideally, vacuum high-traffic areas at least once a week and less frequented spaces every couple of weeks. But if you have pets, daily vacuuming might just be your new cardio routine!

Are bagless vacuum cleaners better?

Bagless vacuums offer convenience and transparency (you can see the dirt!), but bags can trap allergens better. It really depends on your cleaning style and preferences!

What’s the best way to clean my vacuum?

Regularly empty the dust container (if bagless), clean filters according to the manual, and check for hair or debris stuck in the brushes. Think of it as giving your vacuum a spa day!

Can I vacuum up crumbs and pet hair at the same time?

Absolutely! Most vacuums can tackle both, but make sure to get one specifically designed for pet hair if your furry friends shed like there’s no tomorrow!

Is a robot vacuum worth it?

If you love the idea of a mini robot doing your cleaning while you binge-watch your favorite shows, then yes! They’re great for maintaining cleanliness, though they might not replace your deep-cleaning sessions.

LED shower head Make Your Shower a Light Show

LED shower head

Imagine stepping into your shower and being greeted by a rainbow of colors dancing around you like you just walked into a disco! That’s the magic of the LED shower head—a shower experience that doesn’t just cleanse you but also dazzles your senses. These futuristic fixtures not only add a splash of color to your bathroom but also come packed with features that make your daily rinse feel like a spa getaway.

LED shower heads operate using clever technology that lights up with water flow, adding a bit of pizzazz to your routine. There are various types to choose from, whether you want a handheld version or a fixed one, and they boast benefits that traditional shower heads can only dream of—like saving water while still giving you the best shower of your life.

LED Shower Head Features

LED shower head

Imagine stepping into your shower and being enveloped by a dazzling array of colors that dance and twinkle with every drop of water. LED shower heads do just that! These innovative devices combine the utility of a shower with the captivating allure of colored lights, transforming an ordinary rinse into a celestial experience. With technology that employs water flow to power the lights, you can enjoy a spectacular display while cleansing away your worries.

The technology behind LED shower heads is as impressive as it is functional. Each unit contains small LEDs that illuminate when water flows through them, utilizing a generator that converts the kinetic energy of the flowing water into electrical energy. This not only ensures that no batteries are needed, but it also makes the shower heads eco-friendly. In addition to the lights, many models also feature adjustable spray patterns and water-saving technology, further enhancing the shower experience with both efficiency and fun.

Types of LED Shower Heads

Diving into the world of LED shower heads reveals a delightful assortment of options, each with its own unique charm. Here’s a quick rundown of the types you can find:

  • Single-Color LED Shower Heads: These models typically glow in one color, often blue, red, or green, providing a serene ambiance that can aid relaxation or invigoration, depending on your choice.
  • Multi-Color LED Shower Heads: Equipped with RGB LEDs, these shower heads can cycle through multiple colors, creating a vibrant light show reminiscent of a disco party in your bathroom.
  • Temperature-Sensitive LED Shower Heads: These clever devices change color based on water temperature—blue for cold, green for warm, and red for hot—making it easier to avoid those surprise scalding moments.
  • Handheld LED Shower Heads: Perfect for those who want control, these portable options provide the same visual delight with the added benefit of versatility in spray direction.

Benefits of Using an LED Shower Head

Upgrading to an LED shower head brings a host of benefits that go beyond just aesthetic appeal. The following advantages make this upgrade a smart choice for any home:

  • Energy Efficiency: LED technology uses significantly less power than traditional lighting, reducing your energy bill while giving you the same dazzling effect.
  • Water Conservation: Many LED shower heads are engineered to optimize water flow, helping you save on water usage—good for the environment and your wallet.
  • Enhanced Shower Experience: The visual stimulation of colored lights can improve your mood and transform shower time into a mini spa retreat.
  • Easy Installation: Most LED shower heads are designed to fit standard plumbing, allowing for hassle-free installation that doesn’t require a degree in engineering.

“Step into a world where efficiency meets entertainment—a simple upgrade can turn your daily routine into a vibrant experience!”

Home Improvement with LED Shower Heads

Transforming your bathroom into a shimmering oasis has never been easier, thanks to LED shower heads. These delightful gadgets don’t just turn water into a colorful cascade; they also elevate your bathroom’s style quotient to dizzying heights. Picture this: stepping into your shower and being greeted by a splash of vibrant colors dancing against the tiles, creating a sensory experience that could make even the grumpiest morning person feel like they’re in a tropical paradise.

Talk about a glow-up!Choosing the right LED shower head is as crucial as selecting the perfect paint color for your walls. The key here is to match the mood and theme of your bathroom decor. Whether you’re going for sleek modern minimalism or a cozy rustic vibe, there’s an LED shower head out there that can harmonize with your vision.

Let’s dive into the nitty-gritty details of picking the perfect LED shower head.

Selecting the Right LED Shower Head Based on Home Decor Themes

Finding the ideal LED shower head requires careful consideration of your bathroom’s existing aesthetic. Here’s a handy guide to help you choose wisely, ensuring that your new shower head complements, rather than clashes with, your decor theme.

  • Modern Minimalist: Opt for a sleek, chrome-finished LED shower head. The clean lines and polished surface will reflect light beautifully, enhancing the airy feel.
  • Rustic Charm: Go for a brushed nickel or oil-rubbed bronze LED shower head. Its earthy tones will blend seamlessly with wooden accents and stone tiles.
  • Bohemian Vibes: Choose a colorful, artistic LED shower head. Look for designs with playful patterns that add a funky flair to your eclectic space.
  • Luxurious Spa: Consider a waterfall-style LED shower head with multiple light settings. This will create a soothing ambiance akin to a fancy spa retreat, right in your own home.

Selecting the right fixture is just the first step. Installation is key to ensuring your LED shower head performs its magic correctly. Here’s how you can easily install it yourself, without the need to call in the cavalry—or a plumber.

Step-by-Step Guide for Installing an LED Shower Head

Installing an LED shower head is as easy as pie, provided you follow these simple steps. No need to panic—this isn’t rocket science!

1. Gather Your Tools

You’ll need an adjustable wrench, plumber’s tape, and your shiny new LED shower head. Think of this as your toolkit for bathroom enlightenment.

2. Turn Off the Water Supply

This is crucial unless you want to experience an unplanned water park adventure in your bathroom. Locate the shut-off valve and give it a twist.

3. Remove the Old Shower Head

Use the adjustable wrench to gently unscrew the old shower head from the shower arm. If it’s stubborn, a little elbow grease might be required, but don’t overdo it; you’re not trying to wrestle a bear.

4. Clean the Threads

Before you install the new head, clean the threads on the shower arm to remove any old tape or debris. This will help achieve a snug fit and prevent leaks.

5. Apply Plumber’s Tape

Wrap plumber’s tape around the threads of the shower arm in a clockwise direction. This will provide a better seal and keeps the water where it belongs—inside the pipes!

6. Attach the LED Shower Head

Screw the new LED shower head onto the shower arm by hand. Once it’s snug, use the wrench to tighten it gently. Remember, over-tightening can lead to cracks—a big no-no!

7. Turn on the Water Supply

Slowly turn the water supply back on and check for leaks. If everything is dry as a bone, congratulations! You’ve successfully installed your LED shower head.

8. Test the Lights

Hop in, turn on the water, and bask in the colorful glow of your new shower experience. It’s like a disco party, minus the questionable dance moves!Installing an LED shower head is not just about function; it’s about creating an atmosphere that resonates with your style. So why not embrace the light and let your bathroom shine?

Energy Efficiency and Environmental Impact

Imagine stepping into your shower and feeling like you’re not just washing away the dirt of the day but also saving the planet one droplet at a time. LED shower heads aren’t just flashy—quite literally—they’re champions in the battle against energy waste and water overconsumption. With a few innovative features, these eco-friendly gadgets are making waves in our bathrooms, offering a splash of creativity while being kind to Mother Earth.LED shower heads come equipped with energy-saving features that do more than just light up your shower experience; they can drastically reduce your water usage and energy bills.

By using smart technology, they monitor water flow and temperature, ensuring that you’re not just indulging in a luxurious shower but doing so sustainably. This means you can enjoy that invigorating burst of color while knowing you’re not draining the planet’s resources.

Water Consumption Comparison

When it comes to conserving water, LED shower heads really know how to make a statement. Let’s break down the numbers between an LED shower head and a traditional shower head, because who doesn’t love a good showdown?

Traditional Shower Heads

A standard shower head can use anywhere from 2.5 to 5 gallons of water per minute (GPM). If you spend an average of 10 minutes in the shower, that’s a whopping 25 to 50 gallons of water down the drain each time you scrub-a-dub-dub.

LED Shower Heads

In contrast, many LED shower heads are designed to limit flow to around 1.5 to 2.0 GPM. So, over that same 10-minute shower, you’re looking at a water consumption of only 15 to 20 gallons—essentially giving your old shower head a serious run for its money.

“Save water, save energy, shower happy!”

In addition to saving water, LED shower heads utilize advanced technologies to minimize energy consumption. Many models include features such as temperature control, which not only enhances your shower experience but also prevents unnecessary heating of water, conserving energy. This dual action—reducing both water use and energy consumption—translates into significant savings on utility bills and a reduced carbon footprint. Imagine the joyous feeling of seeing your water and energy bills shrink while basking under a colorful cascade! Showering with LED heads is like telling your wallet and the environment, “I’ve got your back!”With the world increasingly embracing sustainability, making the switch to an LED shower head is not just a personal upgrade; it’s a step towards a brighter, greener future.

So why not take the plunge into energy efficiency? Your shower—and the planet—will thank you!

Last Recap

LED shower head

In conclusion, upgrading to an LED shower head is like turning on the fun faucet in your home. Not only do these beauties enhance your bathroom’s aesthetics, but they also promote energy efficiency and environmental sustainability. So, if you’re ready to make your showering experience not just a necessity but a delightful escape, it’s time to dive into the colorful world of LED shower heads!

Frequently Asked Questions

Do LED shower heads require special installation?

Nope! Most LED shower heads are easy to install and usually just screw on like any regular shower head.

Are LED shower heads safe for children?

Absolutely! The lights are low-voltage and specifically designed to be safe, making bath time fun and colorful for kids.

Will the LED lights burn out quickly?

Not at all! The LED lights are designed to last for thousands of hours, so you can enjoy the spectacle for a long time.

Do LED shower heads consume more water?

Nope! Many LED shower heads are designed to be water-efficient, often using less water than traditional models while still providing a great shower experience.

Can I change the colors of my LED shower head?

Bathtub faucet Designs Styles and Efficiency Unleashed

Faucet replacement bathtub tub edgerton ohio spout jeremykrill replacing old wall

Bathtub faucet, the unsung hero of bathroom design, is often overlooked until you find yourself wrestling with a stubborn drip or pondering how to make your bathroom shine like a magazine cover. With a plethora of styles ranging from sleek contemporary to charmingly traditional, these faucets do more than just control water—they’re the stylish accomplices in your bathing rituals!

Choosing the right bathtub faucet not only enhances the aesthetics of your bathroom but also makes a significant impact on water conservation and energy efficiency. Whether you’re a DIY enthusiast ready to tackle installation or someone just looking to upgrade their bathroom decor, understanding the nuances of bathtub faucets can turn a mundane space into your personal oasis.

Bathtub Faucet Design and Styles

Bathtub faucet

Bathtub faucets are not just functional; they are also pivotal in defining the style and ambiance of your bathroom. They come in myriad designs, each boasting unique functionalities that can elevate your bathing experience from mundane to magical. Whether you’re aiming for sleek modern aesthetics or a touch of vintage charm, the right faucet is key to achieving that spa-like feel in your home oasis.

Let’s dive into the different designs and styles, shall we?

Contemporary vs. Traditional Faucet Styles

Choosing between contemporary and traditional faucet styles can significantly influence the overall feel of your bathroom. Contemporary faucets are known for their clean lines, minimalistic designs, and often incorporate innovative technologies for a hassle-free experience. On the other hand, traditional faucets hark back to a time of ornate detailing and classic elegance, often featuring intricate handles and vintage finishes.

The decision between these two styles primarily hinges on your existing bathroom decor and personal preference. For instance, a modern bathroom with sleek tiles and glass accents may benefit from a streamlined, high-arc contemporary faucet, while a rustic or vintage-themed bathroom can shine with a charming, cross-handled traditional faucet. To make an informed choice, consider the following factors:

  • Material Quality: The material used in your faucet can influence both its durability and aesthetic. Stainless steel and chrome are popular for contemporary designs, while brass and bronze are often favored for traditional styles.
  • Finish: The finish of the faucet can either blend seamlessly with your existing decor or stand out as a bold statement piece. Popular finishes include polished chrome for modern styles and oil-rubbed bronze for traditional looks.
  • Water Flow Rate: Consider faucets that not only look good but also provide efficient water flow. WaterSense-certified faucets can save you money and help the environment.

Choosing the Right Faucet Style for Your Bathroom Decor

Selecting the right faucet style involves more than just matching colors; it’s about creating a cohesive look that resonates with your personal style. Here’s a handy guide to help you navigate your choices:

  • Consider Existing Fixtures: Take stock of other fixtures in your bathroom such as towel racks, light fixtures, and cabinet handles. Aim for harmony among all elements to enhance visual appeal.
  • Evaluate Bathroom Size: In smaller bathrooms, opt for compact faucets that won’t overwhelm the space. Conversely, larger bathrooms can accommodate more striking, elaborate designs.
  • Style Consistency: If your bathroom features a modern aesthetic, lean towards faucets with geometric shapes and smooth finishes. For a traditional look, select faucets that boast curvy designs and intricate details.

“A faucet is not just a water dispenser; it’s the jewel of your bathroom!”

Ultimately, the right bathtub faucet can transform your bathing experience and elevate your overall bathroom aesthetic. Think of it as the crowning glory of your home spa, where style meets functionality in a harmonious blend of design. So, whether you choose a sleek modern marvel or a charming traditional piece, make sure it reflects your unique taste and enhances your bathing oasis.

Installation and Maintenance of Bathtub Faucets

Faucet replacement bathtub tub edgerton ohio spout jeremykrill replacing old wall

Installing a bathtub faucet might seem as complicated as assembling IKEA furniture without the instructions, but fear not, dear DIYer! With a few tools and some patience, you’ll have that faucet shining and flowing in no time. Let’s dive into the world of installation and maintenance, ensuring that your bathtub faucet not only looks good but works like a charm.

Efficient Installation of Bathtub Faucets

To successfully install a bathtub faucet, a systematic approach is key. Gather your tools: a wrench, a screwdriver, Teflon tape, and perhaps a rubber duck for moral support. Here’s a step-by-step guide to turn your faucet installation from a potential disaster into a triumph:

  1. Turn Off Water Supply: The first step to a successful installation is to turn off the water. No one wants a surprise shower while working on their faucet!
  2. Remove the Old Faucet: Using your wrench, carefully remove the nuts securing the old faucet. If it’s being stubborn, a little elbow grease will do the trick.
  3. Prepare the Surface: Clean the area where the faucet will be installed. This ensures a smooth seal and a cleaner look. Bring out the sponge and channel your inner cleaning guru!
  4. Install the New Faucet: Position the new faucet in place and secure it with the provided nuts. Don’t forget to use Teflon tape on the threads for a watertight seal. It’s like a cozy blanket for your plumbing!
  5. Reconnect Water Supply: Once everything is snug, reconnect the water supply. It’s the moment of truth; let’s see if you’ve mastered the art of faucet installation.
  6. Check for Leaks: Turn on the water supply gradually and check for leaks. If you see water escaping, don’t panic. Just tighten the connections, and you’re good to go!

Common Maintenance Tasks for Optimal Faucet Condition

Even the fanciest bathtub faucet needs a little TLC now and then! Regular maintenance is crucial if you want your faucet to keep gushing happiness rather than disappointment. Here are the essential tasks you should consider:

“An ounce of prevention is worth a pound of cure.”

Benjamin Franklin, probably after fixing a leaky faucet.

  • Regular Cleaning: Wipe down the faucet with a gentle cleaner to prevent mineral build-up. Avoid abrasive materials that could scratch the shine.
  • Inspect for Leaks: Periodically check the faucet for any signs of leaking or drips. Small leaks can lead to larger problems faster than you can say ‘plumbing nightmare.’
  • Check the Aerator: Remove and clean the aerator every few months. It’s like giving your faucet a spa day and helps improve water flow efficiency.
  • Tighten Loose Parts: Over time, parts may loosen due to use. Regularly check and tighten any loose screws or nuts to avoid bigger issues.
  • Replace Washers and O-Rings: If you notice any dripping, it might be time to replace the rubber washers or O-rings. They wear out faster than a pair of favorite shoes!

Troubleshooting Common Faucet Issues

Sometimes your faucet might decide to throw a tantrum. Here’s how to troubleshoot some of the most common issues without calling in a rescue team.

  1. Dripping Faucet: This is usually caused by worn-out washers or O-rings. To fix, turn off the water supply, disassemble the faucet, and replace the faulty parts.
  2. Low Water Pressure: If the water trickles like it’s on a coffee break, check for clogs in the aerator or supply lines. Clean or replace these components as needed.
  3. Noise When Turning On: If your faucet sounds like a squeaky door, it may have loose parts or air in the lines. Tighten connections and bleed air from the system by running the faucet.
  4. Temperature Issues: If your faucet decides to play hot and cold with you, it might be a sign of a faulty cartridge. Replacing the cartridge should restore normal temperature control.
  5. Faucet Won’t Turn Off: If your faucet is determined to keep the party going, check for stuck or broken parts. Sometimes a good cleaning or replacement is all it needs to calm down!

Energy Efficiency and Water Conservation

In a world where water is more precious than a celebrity’s secret, choosing energy-efficient faucets for your bathtub can save gallons of water and heaps of cash. It’s like finding a unicorn in your plumbing; not only do these faucets help you conserve water, but they also keep your utility bills from soaring to the moon. Let’s dive into how modern faucet technology is the superhero your bathroom didn’t know it needed.Modern faucet technology is a marvel of engineering, designed to make every drop count.

With features like aerators, flow restrictors, and smart sensors, these faucets are revolutionizing our approach to water conservation. Aerators mix air with water, reducing the flow rate without sacrificing pressure. Flow restrictors limit the amount of water used per minute, and smart sensors only release water when you need it, like a loyal butler at your sink. This combination not only lowers water consumption but also decreases the energy required to heat that water, leading to a smaller carbon footprint and a happier planet.

Identifying Water-Saving Features in Bathtub Faucets

When venturing into the dazzling world of new bathtub faucets, it’s crucial to know what to look for to ensure you’re making an eco-friendly choice. Here are key water-saving features that could make your bathroom the envy of Mother Nature herself:

  • Low Flow Rate: Look for faucets with a flow rate of 1.5 gallons per minute (GPM) or less. These faucets are like ninjas, stealthily saving water without you even realizing it!
  • WaterSense Certification: This EPA-backed label indicates that a faucet meets specific efficiency criteria—think of it as the faucet equivalent of a gold star for being awesome at water conservation.
  • Aerators: These nifty devices mix air with water, maintaining pressure while using less water. It’s like getting the best of both worlds while saving money and resources.
  • Temperature Control: Some modern faucets come with temperature-control features that minimize the time you spend waiting for hot water, reducing wasted water while you stand there like a frozen popsicle.
  • Smart Sensors: These faucets detect when your hands are nearby and dispense water automatically. Just think: no more turning knobs with wet hands, and you’ll feel like you’re living in the future!

With these features in mind, you’ll be equipped to select a bathtub faucet that not only beautifies your bathroom but also protects our planet—one delightful soak at a time!

Final Wrap-Up

In conclusion, understanding the world of bathtub faucets can make a splash in your home improvement journey. From selecting the perfect design that complements your style to mastering installation and maintenance, you’re now equipped to make informed choices that save water while enhancing your bathroom’s charm. So go ahead, embrace the faucet revolution and let your bathtub be the star of the show!

FAQ

How do I choose the right bathtub faucet?

Consider your bathroom’s style, the faucet’s functionality, and features like water-saving technology.

Can I install a bathtub faucet myself?

Absolutely! With some basic tools and following a guide, you can install it yourself.

What are common issues with bathtub faucets?

Common problems include leaks, low water pressure, and squeaky handles, often easily fixable.

How can I maintain my bathtub faucet?

Regularly clean it, check for leaks, and replace worn-out washers or cartridges to keep it in top shape.

Are modern bathtub faucets energy-efficient?

Yes! Many modern faucets are designed to conserve water and energy, helping you save on bills.

Smart TVs The Future of Binge-Watching Magic

Tvs computers brains

Welcome to the realm where your TV is smarter than your average bear! Smart TVs have strolled into our living rooms like the cool kid at school, revolutionizing how we consume entertainment with a flick of the remote. Gone are the days of squinting at grainy images and wrestling with tangled cords; today’s Smart TVs are sleek, sophisticated, and ready to stream your heart out.

With a myriad of features that set them apart from traditional TVs, Smart TVs are like the Swiss Army knives of home entertainment. They bring you everything from streaming services galore to seamless integration with your smart home devices, making them the ultimate sidekick in your quest for the perfect movie night or gaming marathon.

Smart TVs Overview

Smart TVs have soared in popularity over the last decade, transforming the way we consume entertainment at home. Once just a box that brought us the news and our favorite sitcoms, today’s smart TVs are like tiny internet-connected computers that come with more apps than your smartphone and probably more features than your last car. They’ve become the centerpiece of our living rooms, often serving as a portal to endless streaming, gaming, and social media.The evolution from traditional TVs to Smart TVs has been nothing short of spectacular.

Traditional TVs were limited to cable or antenna signals and occasionally a VCR if you were feeling fancy. Now, Smart TVs allow for seamless connectivity to the internet, enabling viewers to binge-watch their favorite shows, play games, and even control home devices, all from the comfort of their couch. This shift has made home entertainment more interactive and personalized than ever before.

Key Features of Smart TVs

Smart TVs come packed with features that differentiate them from their traditional counterparts. These features elevate the viewing experience, making it more immersive and convenient. A few noteworthy features include:

  • Internet Connectivity: The ability to connect to Wi-Fi allows viewers to access streaming services like Netflix, Hulu, and YouTube with just a few clicks. Gone are the days of waiting in line at Blockbuster!
  • Voice Control: Many Smart TVs come with built-in voice assistants like Alexa, Google Assistant, or their very own proprietary voice recognition systems, so you can change the channel without lifting a finger. Just don’t ask it to play your ex’s favorite show, unless you want a drama!
  • App Ecosystem: Smart TVs offer a variety of downloadable apps tailored specifically for entertainment. Whether it’s games, music, or social media, there’s an app for everything. It’s like having a mini-playground right in your living room.
  • Screen Mirroring: This feature allows users to mirror content from their mobile devices straight onto the TV screen, perfect for showcasing that vacation slideshow no one wanted to see.
  • High-Definition Displays: Many Smart TVs come equipped with 4K and even 8K resolution, offering stunning visuals that can make even your old family videos look like a blockbuster movie.

All these features come together to create an entertainment package that appeals to a wide audience, from casual viewers to hardcore gamers.

Leading Brands and Models

In the competitive world of Smart TVs, several brands stand out, each offering a range of models to cater to various preferences and budgets. Here’s a look at some of the market leaders and their flagship models:

  • Samsung: Known for its QLED technology, Samsung’s flagship models like the QN900A offer stunning picture quality and vibrant colors, making it a favorite among home cinema enthusiasts.
  • Loewe: This luxury brand combines high-end design with state-of-the-art technology. The Loewe bild i series is a stunning piece of art that doubles as a Smart TV.
  • Sony: The A90J OLED is recognized for its brilliant color accuracy and deep blacks, ideal for movie lovers who appreciate a cinematic experience at home.
  • LG: The LG C1 OLED is a top performer in the gaming category, boasting features like low input lag and variable refresh rates, making it perfect for competitive gamers.
  • TCL: Known for offering great value, TCL’s 6-Series provides impressive performance without breaking the bank, making it a popular choice for budget-conscious consumers.

These brands continue to innovate, ensuring that Smart TVs remain at the forefront of technological advancements in home entertainment.

Smart TVs and Home Appliances Integration

Imagine a world where your TV does more than just binge-watch your favorite shows; it transforms into a central hub for all your home appliances! With the magical powers of smart technology, your Smart TV can now communicate with everything from your fridge to your lights, creating an ecosystem that even the Jetsons would envy. Welcome to the future where convenience is just a remote control away!Smart TVs are the Swiss Army knives of home entertainment, seamlessly integrating with a variety of smart devices to create a cohesive smart home experience.

Whether it’s dimming the lights for movie night, adjusting the thermostat for comfort, or even checking the status of your security cameras—all with a few clicks on your TV remote—this technological wonder has got your back. Let’s dive into how you can set up this connectivity and turn your living room into the command center of your home!

Guide to Setting Up Smart TV Connectivity with Home Devices

To unlock the full potential of your Smart TV, you need to connect it to your other smart home devices. This isn’t just a simple pairing; it’s a dance of digital harmony. Here’s a step-by-step guide to getting your Smart TV in sync with your home appliances:

1. Choose a Smart Hub

Invest in a smart hub (like Amazon Echo or Google Nest Hub) if your Smart TV isn’t already equipped with smart home integration capabilities. This will act as the translator for all your devices.

2. Connect to Wi-Fi

Ensure your Smart TV and all smart devices are connected to the same Wi-Fi network. It’s like getting everyone at the party on the same group chat—no one likes being left out!

3. Download Necessary Apps

Install the required apps for your smart devices on your Smart TV. For example, if you have smart lights, download their specific app to manage them from your TV.

4. Link Accounts

Log into your smart device accounts on your Smart TV. This might involve a bit of typing, so prepare your fingers for a workout.

5. Set Up Voice Control

If your Smart TV supports voice commands, activate this feature. Imagine telling your TV, “Dim the lights,” and it obligingly obeys like a well-trained puppy!

6. Create Routines

Use your Smart TV to set up routines that synchronize your devices. For instance, a “Movie Time” routine could turn off the lights, lower the blinds, and start your streaming service, all at once! This integration can lead to an enhanced living experience where you can manage everything from your couch. By spreading your digital wings, you can elevate your home automation to superhero levels!

Enhancing Home Applications with Smart TVs

Smart TVs can be more than just entertainment devices; they can significantly boost the efficiency and security of your home. Here are some nifty methods to use your Smart TV for enhancing other home applications:

Security Camera Integration

By connecting your Smart TV to your home security system, you can monitor live feeds directly on your screen. Picture yourself watching the latest blockbuster while keeping an eye on your front porch—talk about multitasking!

Energy Monitoring

Certain smart TVs can display energy usage stats from compatible devices. By keeping an eye on your energy consumption, you can make informed decisions about usage, potentially lowering your bills. “Looks like the fridge is working overtime; let’s give it a break!”

Smart Thermostat Control

Adjust your thermostat settings right from your TV interface. Imagine snuggling under a cozy blanket while telling your Smart TV, “Set the temperature to a toasty 72 degrees”—your comfort zone awaits!

Entertainment Synchronization

Control your smart speakers and sound systems directly from your Smart TV. Want to blast that theme song from your favorite show? With a few clicks, your entire living room can turn into a concert hall.

Notifications and Reminders

Set reminders or notifications to pop up on your Smart TV, like “Time to water the plants!” Now, your TV is not just a visual feast but a helpful assistant as well.

With smart integration, your Smart TV becomes the maestro, orchestrating a seamless symphony of home automation.

By embracing these integration techniques and functionalities, your Smart TV can elevate your home into a smart haven, merging convenience, security, and efficiency into one delightful package. Welcome to a future where your television is the epicenter of your domestic bliss!

Enhancing Your Home Entertainment with Smart TVs

Smart tvs future tv technology tech curved information gadgets increased security

Optimizing your Smart TV isn’t just about connecting to Wi-Fi and praying for the best. It’s an adventure in sound and vision that can take your binge-watching experience from “meh” to “wow, I need to call my friends!” Let’s dive into the best practices for maximizing your audio and video quality, explore the streaming services that’ll make your TV the star of the living room, and discover how to transform your Smart TV into a gaming powerhouse.

Optimizing Smart TV Settings for Audio and Video Quality

To ensure you’re not left watching your favorite episodes in murky sound and pixelated glory, adjusting your Smart TV settings is crucial. Here are some guidelines to help you achieve that cinematic experience right in your living room:

  • Calibrate Your Picture Settings: Use built-in calibration tools or a calibration disc to adjust brightness, contrast, and color settings. Remember, if your TV looks like it’s stuck in a 90s sitcom, it’s time for a change!
  • Choose the Right Picture Mode: Most Smart TVs offer modes like Standard, Movie, or Vivid. For a true cinematic experience, stick with Movie mode, as it’s usually tuned for the best quality.
  • Audio Adjustment: If your TV has an equalizer, play with the settings to find the best sound mix. Not all sound is created equal—your action movie deserves booming bass while a rom-com might call for more treble.
  • Enable HDR: If your TV supports High Dynamic Range, turn it on. It dramatically enhances contrast and color for a more vibrant picture. Think of it as adding a sprinkle of magic to your viewing experience.
  • Check Connectivity: Use high-speed HDMI cables for the best video and audio quality. Don’t let a cheap cable be the reason your picture looks like a watercolor painting instead of a blockbuster!

Comparison of Streaming Services Compatible with Smart TVs

Choosing the right streaming service can feel like trying to pick a favorite child. Each service has its perks, so let’s break down the major players in the streaming game:

Service Content Variety Unique Features
Netflix Original shows, movies, documentaries; vast library Offline downloads, personalized recommendations
Amazon Prime Video Originals, rentals, and a mix of older films Free shipping on Amazon, option to rent/buy titles
Hulu Current TV shows, original content, movies Next-day access to popular shows, ad-free option
Disney+ Disney classics, Marvel, Star Wars, National Geographic GroupWatch feature for virtual watch parties
Apple TV+ Original content and limited library Integration with Apple devices, family sharing

Using Smart TVs for Gaming

Smart TVs are not just for streaming; they can also provide an exhilarating gaming experience. With the right accessories and setup, you can transform your living room into a gaming arena. Here’s how to level up your gaming on a Smart TV:

  • Connect Your Console: Whether it’s a PlayStation, Xbox, or Nintendo Switch, make sure to use HDMI inputs and select the appropriate picture mode for gaming. You want your enemies to look crisp, not fuzzy!
  • Consider a Gaming-Optimized TV: If you’re serious about gaming, look for TVs with low input lag and high refresh rates. Features like Game Mode ensure your gaming experience is smooth and responsive.
  • Invest in Quality Accessories: A good gaming headset can immerse you in the action, while a comfortable gaming chair can prevent back strain during those marathon sessions. Remember, comfort is key when you’re saving the world!
  • Wireless Controllers: Bluetooth controllers can cut down on cables and clutter. Plus, no one wants to trip over a wire while trying to execute a perfect jump!

Last Recap

Tvs computers brains

In conclusion, Smart TVs are more than just fancy screens—they’re your ticket to a smarter, more entertaining home! With their impressive features and connectivity options, they don’t just show you content; they immerse you in an experience that transforms your living space into a hub of fun and relaxation. So, grab some popcorn and get ready to binge-watch like never before!

Key Questions Answered

What are Smart TVs?

Smart TVs are television sets equipped with internet connectivity, allowing you to stream content, browse the web, and run apps just like your smartphone.

Can I use my Smart TV without the internet?

Yes, you can still watch traditional cable or antenna broadcasts, but you’ll miss out on all the smart features and streaming services.

Do Smart TVs need updates?

Absolutely! Regular updates help fix bugs, enhance performance, and add new features, so keep that TV fresh and updated!

Can I connect my Smart TV to other devices?

Yes, Smart TVs can connect to a variety of devices like gaming consoles, Blu-ray players, and even smart home devices for a fully integrated experience.

Are Smart TVs good for gaming?

They sure are! Many Smart TVs come with low latency modes and high refresh rates, making them great for an immersive gaming experience.